To print out a measurement sheet there are 2 possibilities. Either you print it directly from the item overview on the particular project or you create a report.
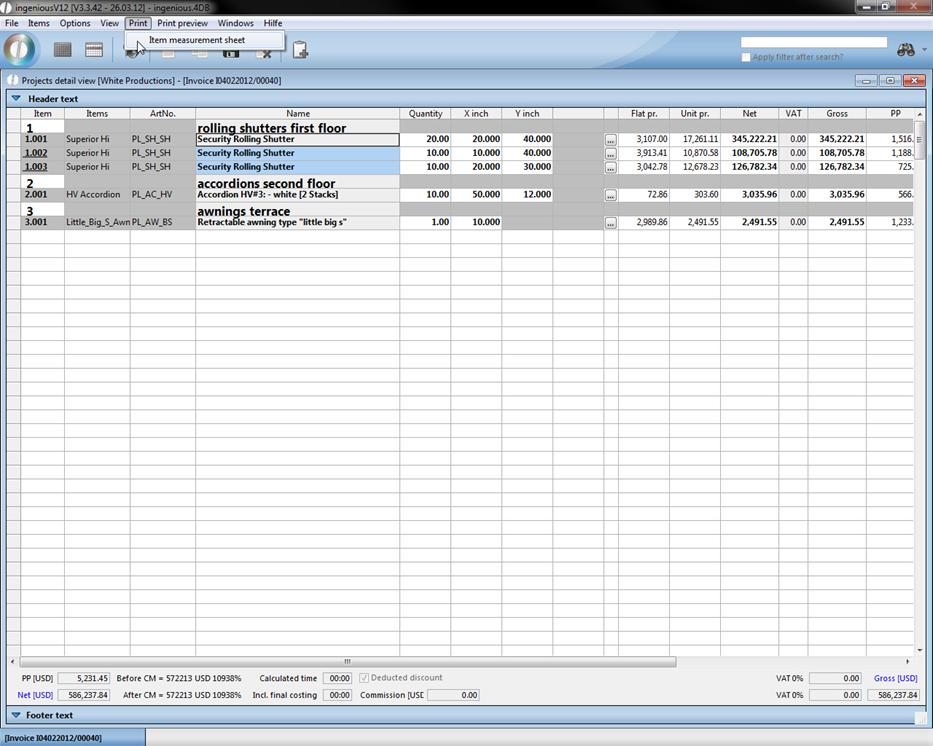
Printing from the item overview
When you are in the item overview of a project, mark the items that should be used in the measurement sheet and click in the menu “Print” on “Item measurement sheet”.

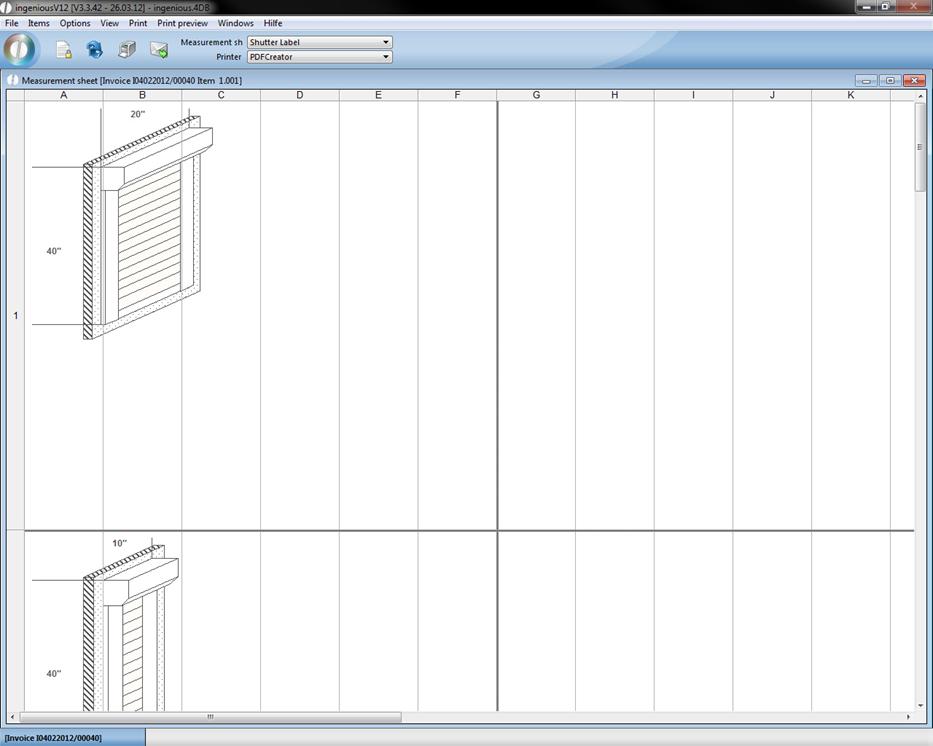
In the new window choose the desired measurement sheet and printer.
When you click on ![]() the measurement sheet will be displayed. The button
the measurement sheet will be displayed. The button ![]() provides the opportunity to edit the measurement sheet. With a click on the printer symbol you can print the displayed sheet.
provides the opportunity to edit the measurement sheet. With a click on the printer symbol you can print the displayed sheet.
Printing with the help of a report
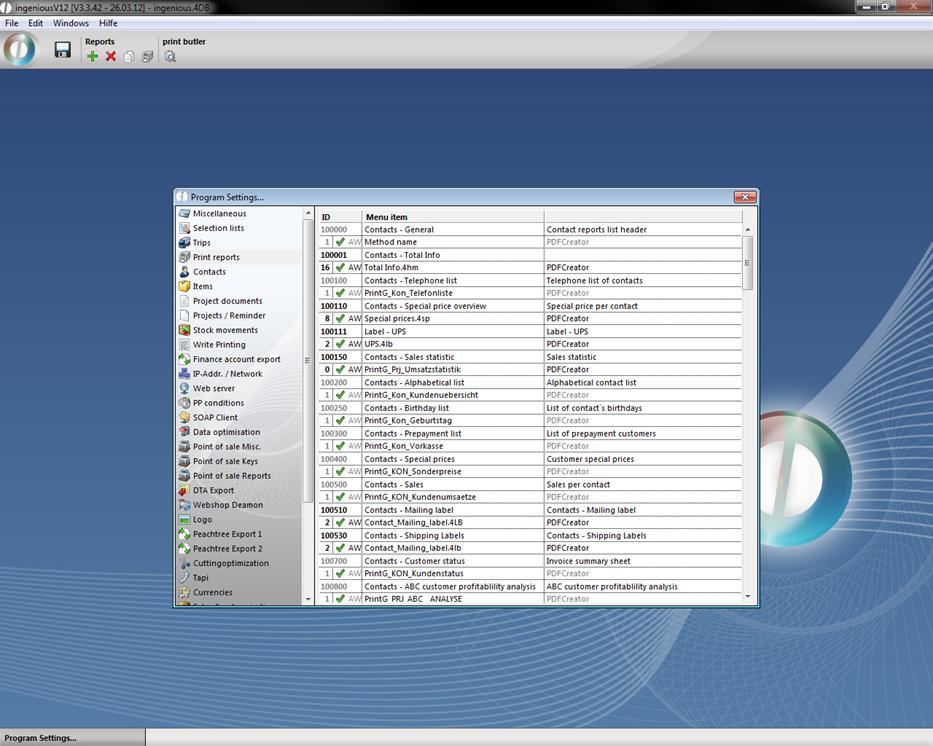
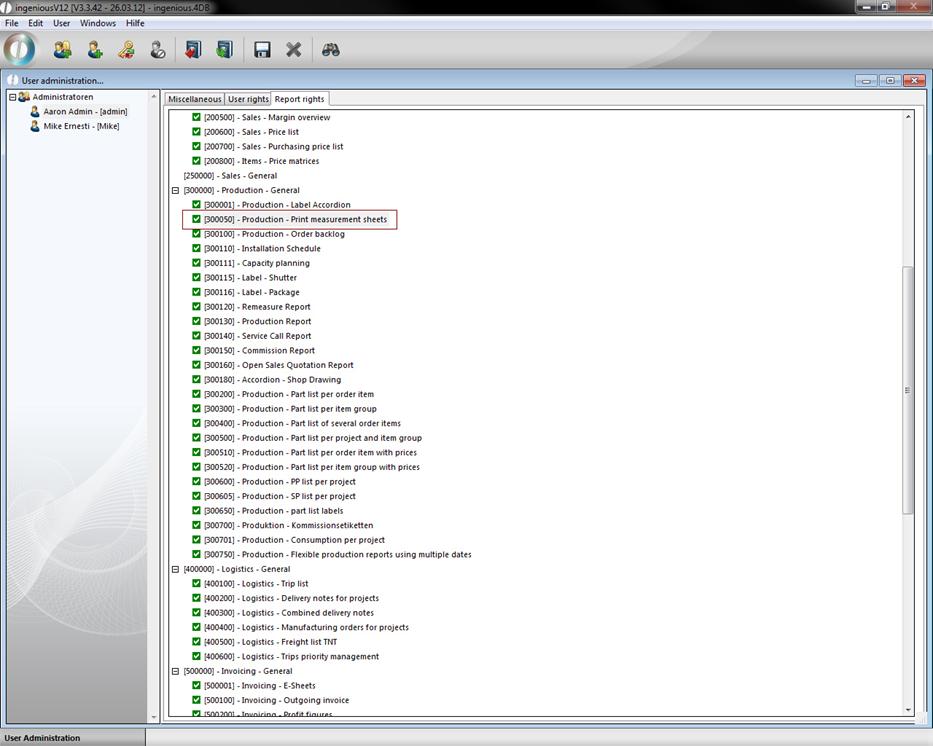
To create a print report you have to go to the program settings and select the category “print reports”.
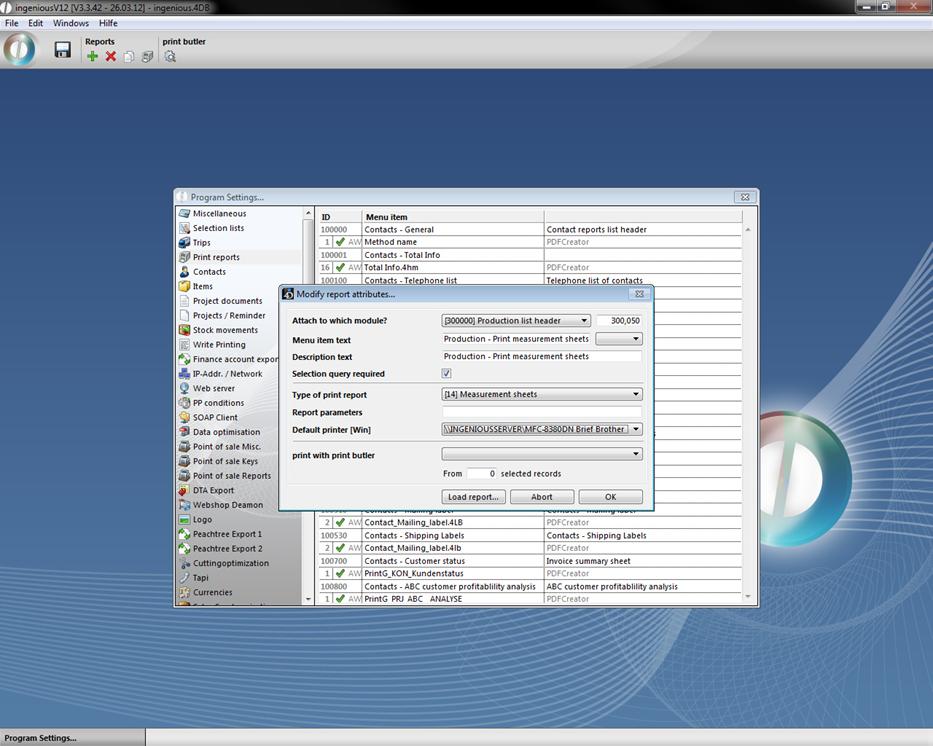
Click on the button ![]() and the window “modify report attributes…” will open up, where you can configure the new print report. You can attach the report to any workflow module (like projects). Here it is important that you choose for “type of print report” the value “[14] Measurement sheets”.
and the window “modify report attributes…” will open up, where you can configure the new print report. You can attach the report to any workflow module (like projects). Here it is important that you choose for “type of print report” the value “[14] Measurement sheets”.
When you click on “Load report…” the measurement sheet assistant will open up showing all available items with the corresponding measurement sheets. With a mouse click you can choose the desired item and measurement sheet und confirm the selection.


Confirm the dialog with “OK” and save the program settings on exit. To use the print report, you have to enable the corresponding report right.
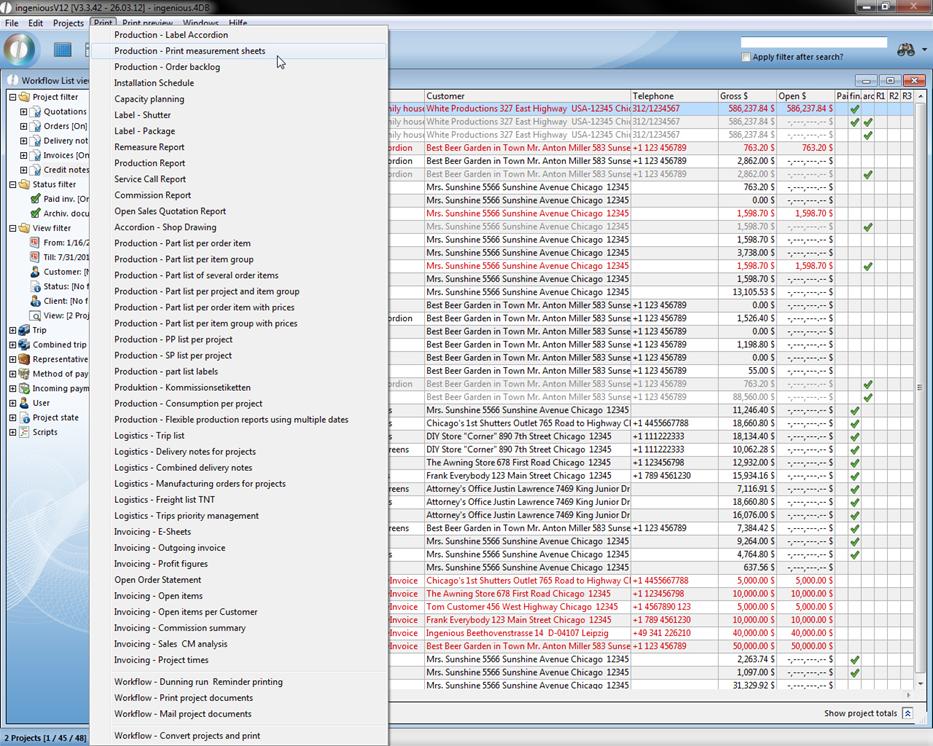
With the help of the new print report now you can print measurement sheets directly from the project list view or the project detail view by clicking in the print menu on the newly created report.
Manufacturing documents
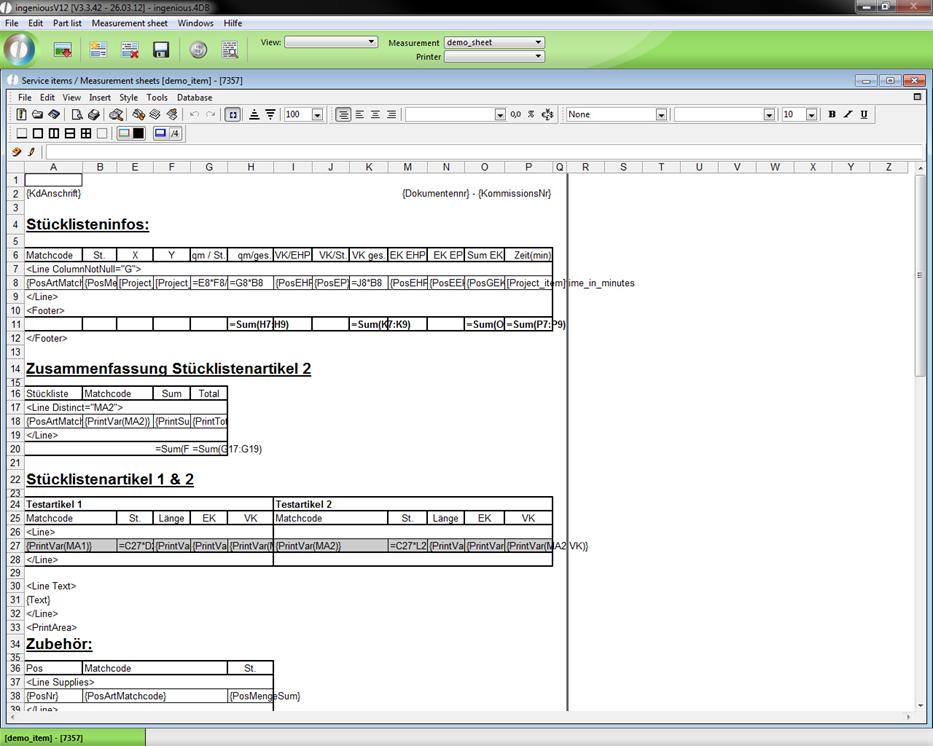
Ingenious.V12 View manufacturing documents allow the creation of flexible and professional spreadsheets with the integrated table calculation. You can freely decide what, where and how information should appear on the manufacturing documents.
Creation of the printing report templates (Spreadsheets)
|
Area |
Border |
Comments |
|
HEADER |
<Header> … </Header> |
In this area, the following references or 4D phrase can be used: 4D view field reference from the tables [Projects] and [contacts], i.e.., [Projects] document description Most Ingenious.V12 placeholders for projects, i.e., {reference}. The complete parts list language, i.e., jum. Lamele, TAB., MID (…), etc. All 4D View formulae, operators, operants and functions, i.e. paragraph, Round Lookup etc. |
|
FOOTER |
<Footer> … </Footer> |
In this area all phrases can be used as they are in the HEADER area. Sum calculations occur here with the use of the 4D view formula SUM, i.e., = SUM (B$22:B26). |
|
LINE |
<Line> … </Line> |
This area is repeated for every well-chosen item of the suitable projects. The line area can also be a multi-line, i.e. per item 2, 3, 4, etc. is printed … etc. In this area the following references or phrases can be used: 4D view field reference from the tables [Projects], [Contacts], and [Items], i.e.., [Items] X sum Most Ingenious.V12 placeholders for items, i.e.., {PostArtMatchcode}. Variables from the defined service items or the checklist of the parts list with the use of the syntax {PrintVar (… .)}, i.e.., {PrintVar (Pogon)}. All 4D view formulae, operators, operants and functions, i.e.., =IF (STRING (J25) = “1”; “X”; " "). |
|
LINE Distinct |
<Line Distinct=“X“> … </Line> |
In this area an evaluation occurs such as line tags with the following change: With this line command, all items that have the same value X are summarized. |
|
LINE VarNotNull |
<Line VarNotNull=“X“> … </Line> |
In this area an analysis occurs such as line tags with the following change: With these commands, all item lines that have the variable X or the value “” or 0 are hidden. |
|
LINE ColumnNotNull |
<Line ColumnNotNull=“X“> ….. </Line> |
In this area, an analysis occurs such as line tags with the following change: With these orders all item lines are hidden if the column X has the value “” or 0. |
|
LINE Supplies |
<Line Supplies> … </Line> |
In this area an evaluation occurs such as line tags with the following change: All marked items that have no spreadsheet are issued. No output of the item data occurs to which the item data belongs. |
|
LINE Multisort |
<Line Multisort= … </Line> |
In this area an evaluation occurs such as line tags with the following change: It’s possible to sort items according to multiple attributes, for instance <Line Multisort=“jum.Type;>;jum.color;<;jum.x;<“> Items will be sorted ascending according to the type, descending to type and descending to length. |
|
PrintArea |
<PrintArea> … </PrintArea TestColumn=“X“> |
The area between <PrintArea> and </PrintArea TestColumn=“X”> will be completely deleted if the conditions in the column X, in the </PrintArea TestColumn=“X”> row is false. In the column X, next to </PrintArea>, a condition of the form must be listed: = (Calculation1=Calculation2). If the field is blank, the area is not shown. |
|
STANDARD |
…
|
This concerns all lines which stand outside the line parameters: In this area, all phrases of the HEADER and FOOTER area can be used. Sum calculations can be applied to cells which stand in lines above the formula. Sums over a line area occur with the 4D view formula SUM, i.e. =SUM (B23:B25), the letter specifies the column, the numbers specify the line numbers <line> and </line> lines. |
|
Deleterow |
<Deleterow> |
Line will be deleted |
|
Insertrow |
<Insertrow XX> |
Empty lines will be added. Instead of XX enter the number of empty lines. |
|
Repeat |
<Repeat XX> … </Repeat> |
Everything in this area will be displayed repeatedly according to the number in XX. |
Example of a spreadsheet with templates
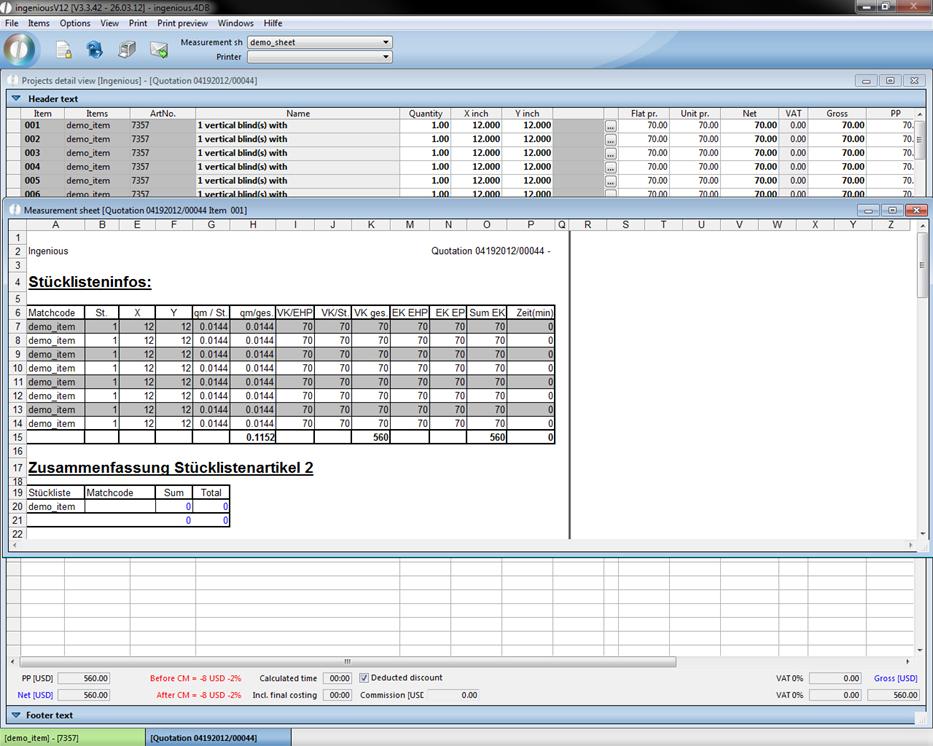
Print preview
While formatting a new report by using headers, lines and footers, it is recommended to analyze the Template‚ Test_1' of the item “Diamond”. Tags for marking the single areas are always permitted only in the first column! Otherwise they are ignored. While creating templates, all important settings must be already marked for the print report, i.e., printing options, page setup, etc., so that the document can be immediately printed later with by clicking on the print icon.